The Azure API Management (APIM) team has released a new feature that makes integration with Azure Service Bus easier than ever — the Send-Service-Bus-Message policy. This powerful addition allows developers to send messages directly from an API call to a Service Bus queue or topic, without writing additional backend code. Note this is currently in public preview.
In this post, you’ll walk through how to configure, secure, and test this new policy step-by-step using Azure Portal, Postman, and Service Bus.

Why This New APIM Policy Matters
Traditionally, sending a message from an API to a Service Bus required custom logic or intermediate components like Azure Functions or Logic Apps. The new Send-Service-Bus-Message policy changes that.
With this feature, you can now:
-
Streamline message-based workflows directly within APIM
-
Reduce latency by eliminating extra services
-
Simplify architecture for event-driven solutions
-
Leverage Managed Identities for secure authentication
-
Improve visibility by keeping message flow within your API pipeline
- Add custom properties to messages before sending to a Queue or Topic
For integration architects and developers, this means faster development and fewer moving parts to maintain.
Prerequisites
Before getting started, make sure you have:
-
An Azure API Management (APIM) instance
-
An Azure Service Bus namespace with at least one queue
-
Proper permissions to assign Managed Identities and policies
-
Postman or any API testing tool for validation
Step 1: Set Up Managed Identity in APIM
- Open your Azure API Management instance in the Azure portal.
- Go to the Identity blade and enable System Assigned Managed Identity.
- Once enabled, Azure will automatically register a Managed Identity for your APIM instance.
This identity allows APIM to securely access other Azure services without storing credentials.
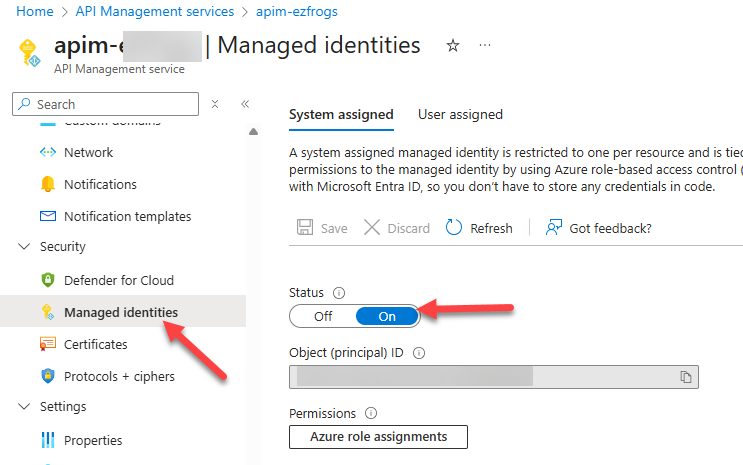
APIM Managed Identities
Step 2: Assign Permissions on the Service Bus Queue
Next, give APIM’s Managed Identity permission to send messages to your queue:
- Navigate to your Service Bus namespace.
- Select Access Control (IAM).
- Add a new role assignment for the APIM Managed Identity.
- Choose the role Azure Service Bus Data Sender and apply it.
This ensures that your APIM instance can send messages to the queue using secure, role-based access.
Step 3: Create or Update Your API in APIM
- In the Azure portal, go to your APIM instance.
- Open APIs and select the one where you want to apply the new policy.
- You can use an existing API or create a new one to test this setup.
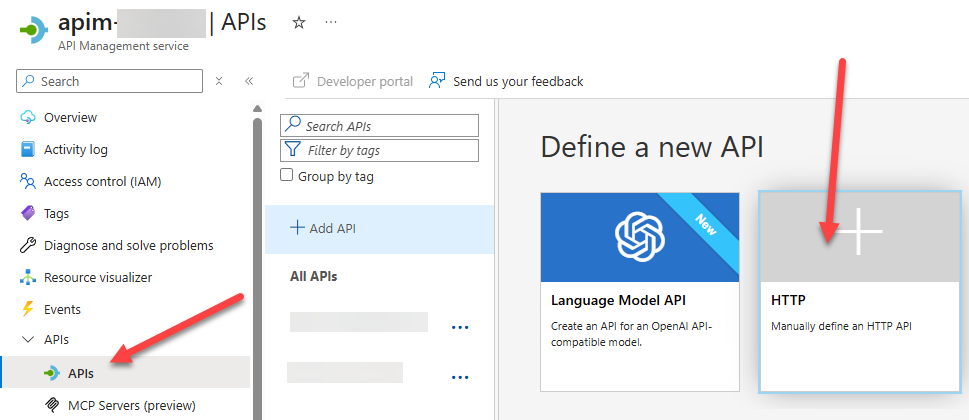
Create New APIM
Step 4: Add the Send-Service-Bus-Message Policy
Inside your API’s Inbound Policy, insert the Send-Service-Bus-Message policy. Here’s an example snippet
Send-Service-Bus-Message Policy
<send-service-bus-message queue-name="QueueName" namespace="NameSpace.servicebus.windows.net">
	<payload>@(context.Request.Body.As<string>(preserveContent: true))</payload>
</send-service-bus-message>
<return-response>
	<set-status code="201" reason="Created" />
</return-response>
Recent Comments