If you have never used an AI-powered command line tool before, stepping into the terminal can feel intimidating. However, the GitHub Copilot CLI changes the dynamic of software development. Instead of memorizing complex syntax or digging through documentation, you can simply ask your terminal to execute tasks in plain English.
In my latest video, I walk through exactly how to get started with the GitHub Copilot CLI from scratch. You need absolutely no prior CLI experience to follow along. We cover everything from simple PowerShell installations to building highly customized AI agents that automate large-scale code upgrades.

GitHub Copilot Chat vs. Copilot CLI
If you are already using GitHub Copilot Chat inside VS Code, you might wonder why you need a dedicated CLI tool. While the chat extension is fantastic for explaining a single method or updating a specific class, the CLI excels at cross-file manipulation. It operates at the project and solution level. Whether you are scaffolding a project from scratch or migrating an entire folder of legacy code, the Copilot CLI is optimized for broad, execution-based tasks.
Step-by-Step Installation & Setup
Getting started is completely painless. Using a Windows 11 environment, you simply open your command window and ensure you have the latest version of PowerShell installed. From there, running winget install GitHub.copilot will download and install the CLI.
Authentication is just as easy. The CLI supports both free GitHub accounts and GitHub Pro accounts (which grant access to premium models and higher request limits). Once authenticated, you can easily toggle between top-tier AI models based on your plan right from the terminal prompt using the /model command.
Mastering Modes, Sessions, and Context
The power of the Copilot CLI comes from how it manages your workflow context. We explore:
-
Execution Modes: By using
Shift + Tab, you can seamlessly toggle between Interactive Mode (the default chat-like experience), Plan Mode (where the AI outlines its approach without writing code), and Autopilot Mode (where the AI rapidly executes tasks to completion). -
Context Management: The CLI reads your files to build context. If your context window gets too full, you can use the
/compactcommand to consolidate chat history and free up space, or/clearto start completely fresh. -
Master Sessions: You can name and save your terminal sessions (e.g.,
/rename ListFiles). This allows you to exit the CLI, jump into the VS Code integrated terminal, and use--continueto instantly pick up exactly where you left off.
Custom Agents and MCP Servers
Once you have the basics down, you can unlock the true potential of the CLI by building Custom AI Agents.
In the tutorial, I demonstrate how to create a custom agent—named “Mr. Upgrade”—specifically instructed to be an expert in migrating legacy .NET 2 applications to .NET 10. By pointing this agent at a target folder, it independently reviews the code, modernizes the syntax, and completes the framework upgrade in minutes.
Furthermore, the CLI natively supports Model Context Protocol (MCP) servers and custom Agent Skills. This means your terminal can securely interact with external APIs, read live Azure documentation, or run custom scripts, turning your standard command line into a highly extensible AI workstation.
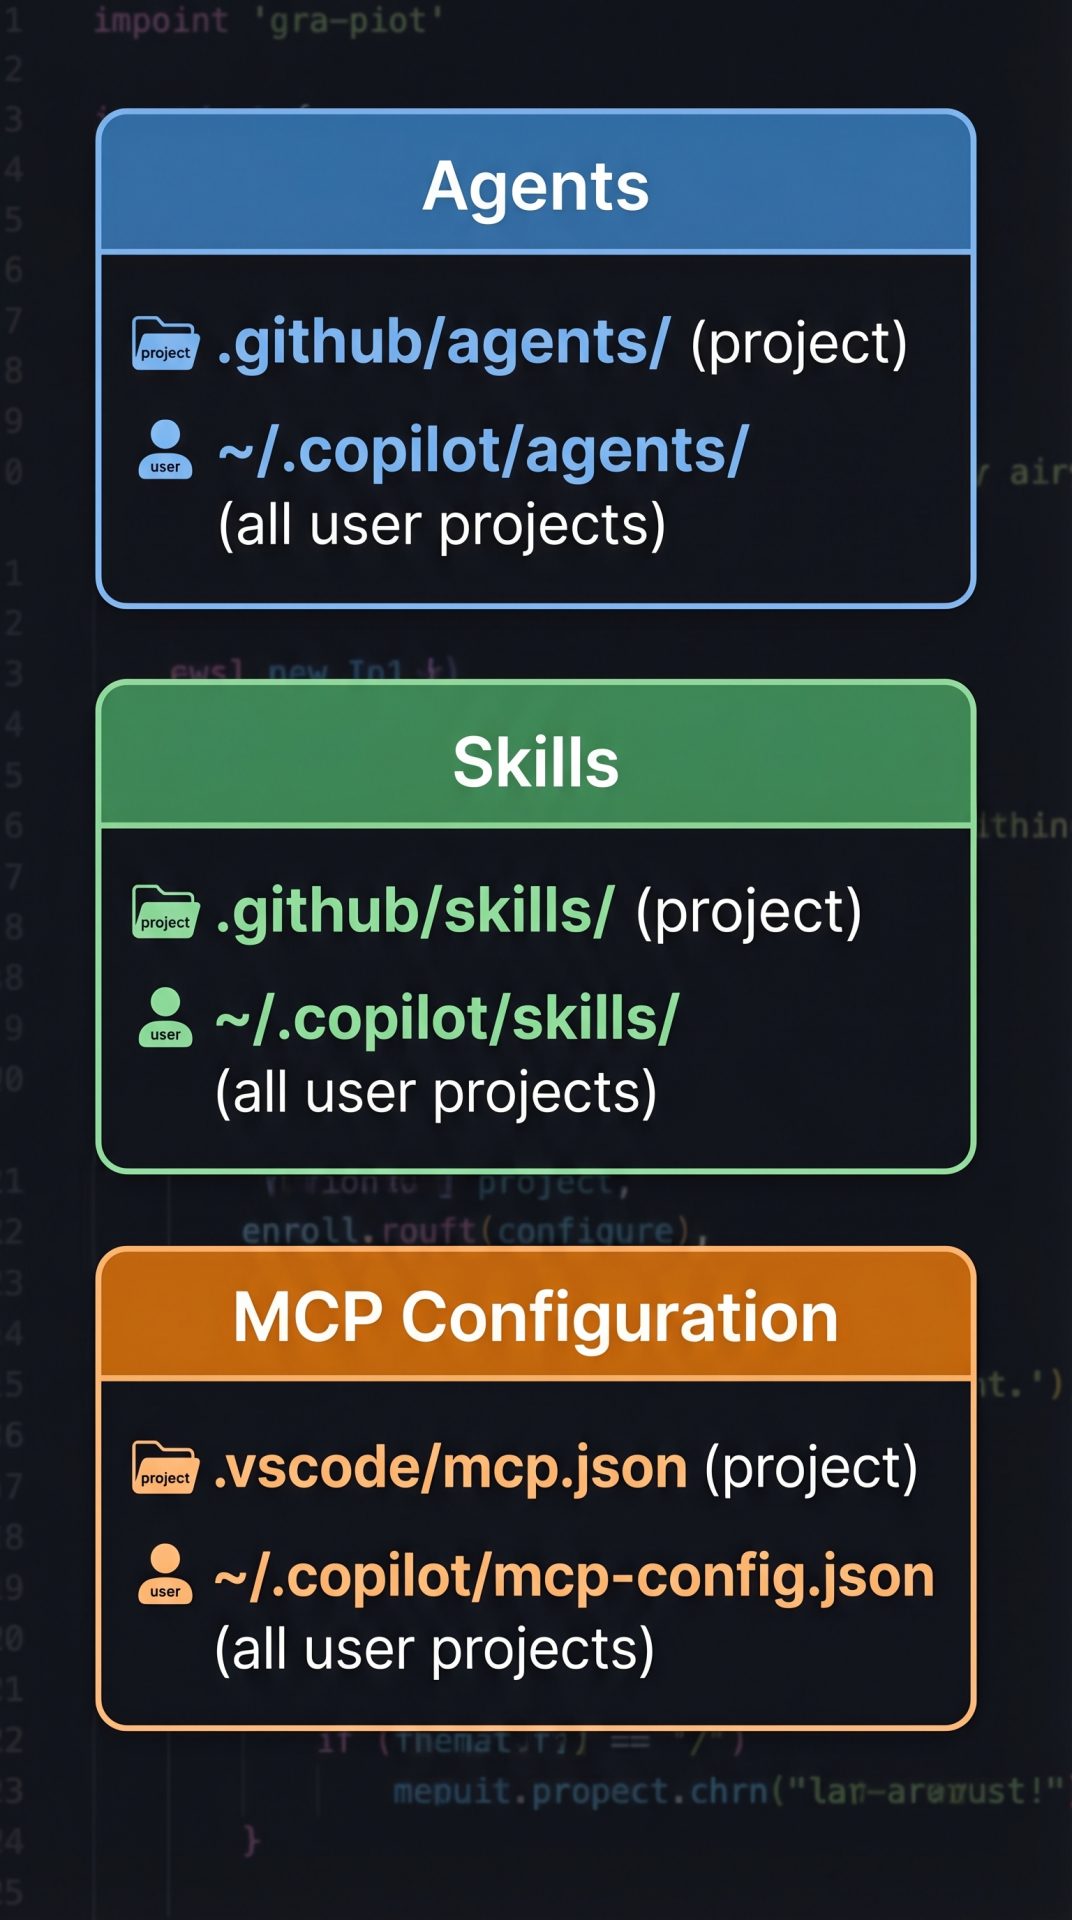
Agent Skills and MCP Locations
Give the GitHub Copilot CLI a try today!
Contact Me
Are you looking for Azure Integration Services or BizTalk Consulting Services?
Copyright © 2025, Stephen W Thomas.
Recent Comments